CIS-11 Home http://www.c-jump.com/CIS11/CIS11syllabus.htm

Text, Tables, Media, and Sound


  1. Creating a Text Box
  2. Create a Text Box
  3. Add Text to an AutoShape
  4. Inserting Slides from Other Presentations
  5. Insert Slides Using the Slide Finder
  6. List of favorite presentations
  7. Inserting a Table
  8. Insert a Table Quickly
  9. Enter Text and Move Around in a Table
  10. Inserting and Playing Media
  11. Insert a Movie or Sound
  12. Change Play Options
  13. Checking Style and Spelling
  14. Set Style Options
  15. Check Style or Spelling

1. Creating a Text Box


2. Create a Text Box


Creating a Text Box
  • If necessary,

    • click the View menu in Normal view,

    • point to Toolbars,

    • click Drawing to display the Drawing toolbar.

  • On the Drawing toolbar,

    • Click the Text Box button.

  • To add text that wraps, drag to lengthen the box, and then start typing.

  • To add text that doesn't wrap, click and then start typing.

  • Click outside the text box to deselect it.
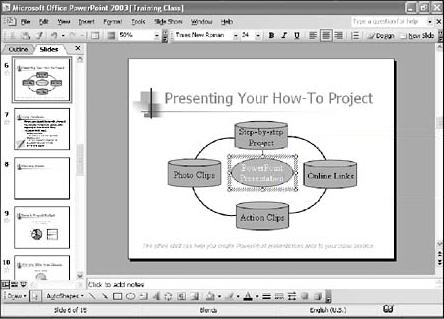
3. Add Text to an AutoShape


Add Text to an AutoShape
  • Select the AutoShape to which you want to add text.

  • Type the text.

  • You can wrap text in an AutoShape or resize it:

    • Right-click the AutoShape,

    • click Format AutoShape,

    • click the Text Box tab,

    • select the Word Wrap In AutoShape check box

    • or select the Resize To Fit Text check box

    • click OK.

4. Inserting Slides from Other Presentations


5. Insert Slides Using the Slide Finder


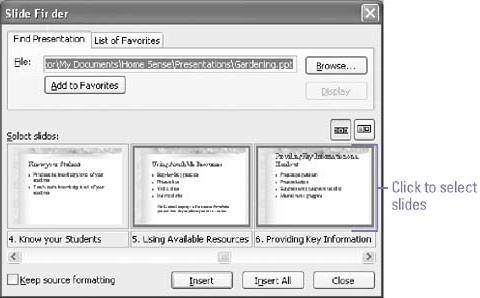
Insert Slides Using the Slide Finder
  • Click the Insert menu,

  • click Slides From Files.

  • Click the Find Presentation tab.

  • Click Browse, locate and select the file you want, click Open.

  • If necessary, click Display to display a miniature of each slide.

  • Select the slides you want to insert:

    • To insert one slide, click the slide, then click Insert.

    • To insert multiple slides, click each slide you want to insert, then click Insert.

    • To insert all the slides in the presentation, click Insert All.

6. List of favorite presentations


7. Inserting a Table


8. Insert a Table Quickly


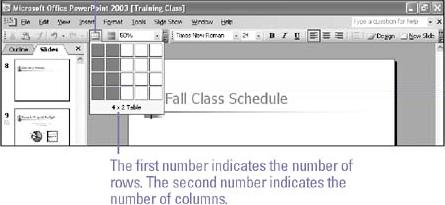
Insert a Table Quickly
  • In Normal or Slide view, display the slide to which you want to add a table.

  • On the Standard toolbar,

  • click the Insert Table button.

  • Drag to select the number of rows and columns you want.

  • Release the mouse button to insert a blank table.

  • Press Esc to cancel the selection.

9. Enter Text and Move Around in a Table


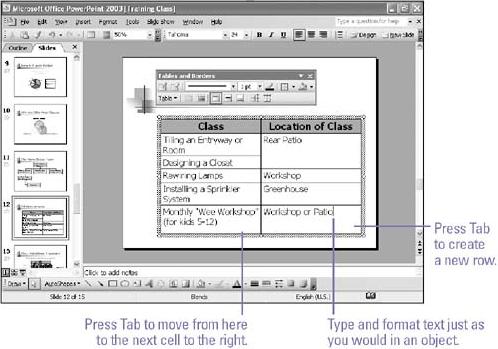
Enter Text and Move Around in a Table
  • Click in a cell to place the insertion point and type your text.

  • Choose one of the following:

    • Press Enter to start a new paragraph within that cell.

    • Press Tab to move the insertion point to the next cell to the right (or to the first cell in the next row).

  • Use the arrow keys or click in a cell in the table to move around.

10. Inserting and Playing Media


11. Insert a Movie or Sound


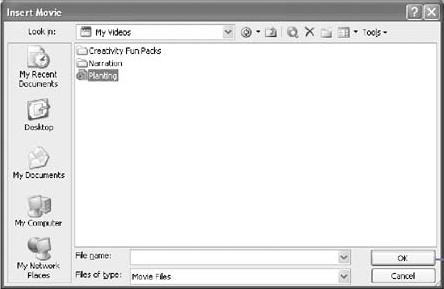
Insert a Movie or Sound
  • Click the Insert menu,

  • point to Movies And Sound,

  • click a command to insert a movie or sound from the Clip Organizer or a file.

  • Locate the movie or sound you want to insert from the Clip Organizer or a folder.

  • Click the movie or sound you want in the Clip Organizer, or click one from the dialog box, and then click OK.

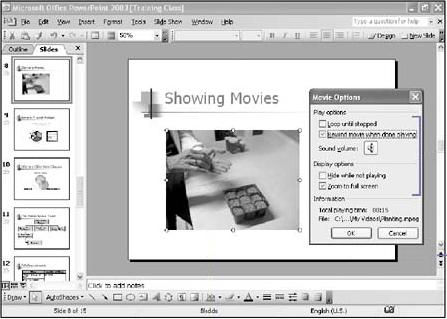
12. Change Play Options


Change Play Options
  • Right-click the sound icon or movie object,

  • click Edit Sound Object or Edit Movie Object.

  • Change the sound or movie settings.

    • To play continuously, select the Loop Until Stopped check box.

    • For a movie, select the Rewind Movie When Done Playing check box, or select the Zoom To Full Screen check box.

    • For a sound, select the Hide Sound Icon During Slide Show check box.

    • Click OK.

13. Checking Style and Spelling

  • PowerPoint spellchecker checks the spelling of

    • entire presentation including all slides,

    • outlines,

    • notes pages,

    • handout pages.

  • Correction in two different ways:

    • Spelling button on the Standard toolbar checks the entire presentation.

    • If you see wavy red line under a word:

      • right-click the word and choose the correct spelling from the list.

  • PowerPoint style checker works with the Office Assistant to help correcting common presentation style mistakes:

    • incorrect font size,

    • inconsistent punctuation,

    • other readability problems.

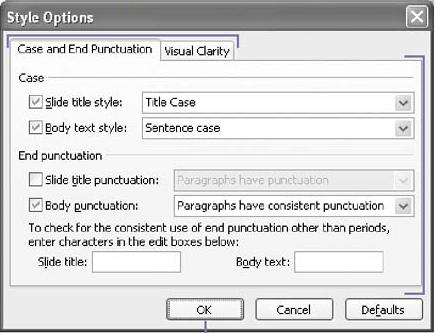
14. Set Style Options


Set Style Options
  • Click the Tools menu,

  • click Options.

  • Click the Spelling And Style tab.

  • Select the Check Style check box.

  • Click Style Options.

  • Click the Case And End Punctuation tab or the Visual Clarity tab.

  • Select the style options you want to set.

  • Click OK twice.

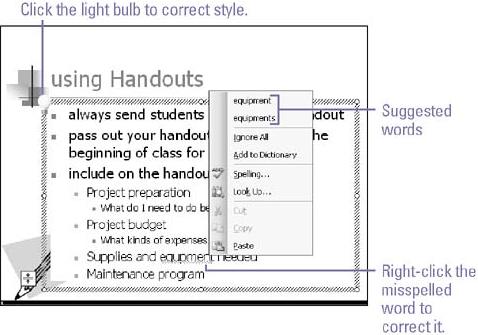
15. Check Style or Spelling


Check Style or Spelling
  • If a light bulb appears,

    • click the light bulb,

    • click an option on the Office Assistant.

  • If a red wavy line appears under a word as you type,

    • right-click the word,

    • click the correct spelling.

  • To spell-check the entire presentation,

    • click the Spelling button on the Standard toolbar.

  • If the Spelling dialog box appears:

    • Change button changes the spelling,

    • Ignore button ignores the word,

    • Add button adds word to the dictionary.