Course list http://www.c-jump.com/bcc/
Vertex Processing
Coordinate transformations
Compute color for each vertex
Clipping and Primitive Assembly
Assemble sets of vertices into lines and polygons
Clipping volume culls out geometry outside, and clips geo that straddles
Rasterization
Determine which pixels are inside each polygon (primitive)
The output is a set of fragments for each primitive
Fragment Processing
Fills in the pixels in the frame buffer -- what's visible on the screen
Hundreds (or thousands) of GPUs are available to execute...
shaders -- GPU programs to manipulate vertices and pixel colors
Shaders are programs with C-like syntax
Shaders must be compiled and linked from plain text source code at runtime
We need at least two shaders:
Vertex shader -- handles vertex transformations and lighting calculations
Fragment shader -- handles per-pixel operations, e.g. determine lighting/color
Shaders get data from:
Vertex attributes (vertex shaders only) -- data for each vertex in a four-component vector form copied from your OpenGL program into a buffer
Uniforms (vertex/fragment shaders) -- a single value shared between all attributes
used often to pass transformation matrices to the vertex shader
Texture (used mostly by fragment shaders) -- specify texture data
#version 150
in vec4 vPosition; // This data is from your OpenGL code
void main()
{
gl_Position = vPosition;
}
#version 150
out vec4 fColor;
void main () {
// Hard-coded red color
fColor = vec4(1.0, 0.0, 0.0, 1.0);
}
out and in
Used for passing data between shaders
Our C++ program has no access to these variables
Vertex shader's out variable corresponds to the fragment shader's in variable.
We typically create a single batch of vertices to draw
We generally set up all "features" before drawing anything
State machine mentality
We always have vertices, but we can render them in 7 different ways
GL_POINTS
GL_LINES
GL_LINE_STRIP
GL_LINE_LOOP
GL_TRIANGLES // we'll be using these a lot!!
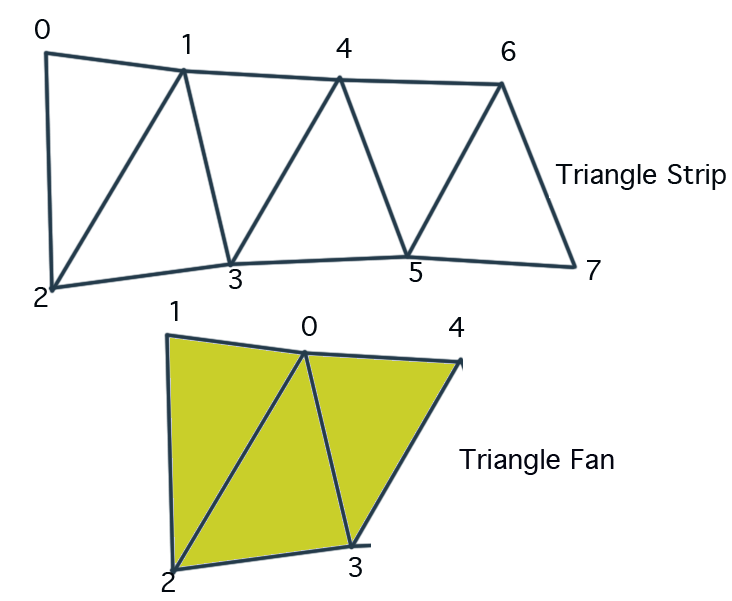
GL_TRIANGLE_STRIP
GL_TRIANGLE_FAN
Can change the point sizes, but not important right now
Points are always square unless anti-aliased
Connects in pairs (line segments), so should have an even number of points
Change line width with glLineWidth()
glLineWidth( GLfloat width );
In a connect-the-dots fashion, draw from one vertex to another
Closes the loop
Is typically what you would use for an outline
Connects three vertices
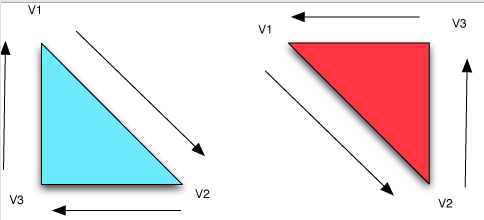
Triangle Winding considers the order of the vertices you specify to draw triangles:
Clockwise
Counter-Clockwise
Why is this important? If using glFrontFace( GL_CCW ) (this is default mode)
Counter-clockwise is front facing
Clockwise is back facing - not visible!
This can be reversed by glFrontFace( GL_CW )
We specify the first triangle by providing three vertices
The next vertex creates a new triangle
The next vertex creates a new triangle, and so on
Create a fan where first vertex is the central vertex
Specify first triangle, then each new vertex is a wedge of the fan
Typically there are several objects on the screen
Objects are made of many triangles
What happens if one triangle is on top of another?
What if a triangle is too close or too far away?
Also, should you be able to see the inside of an object?
The depth of the triangles is important!
Simply means "Don't draw triangles that don't face the camera"
Face culling is initially disabled
Two steps to enable:
glEnable( GL_CULL_FACE );
glCullFace( GL_BACK );
glCullFace() can also specify:
GL_FRONT
GL_FRONT_AND_BACK // no faces are drawn, but other
// primitives such as points and lines are drawn.
Culling the back-facing triangles does not solve the problem with front-facing triangles positioned in front of one another.
Depth testing solves this problem and removes hidden surfaces
Each pixel has a depth (z-value)
Higher values mean closer to the camera
Pixel depth values are stored in the depth buffer
glutInitDisplayMode( GLUT_DOUBLE | GLUT_RGBA | GLUT_DEPTH );
glEnable(GL_DEPTH_TEST);// Make sure the depth buffer is on.
Polygons do not have to be filled
We have 3 modes to draw polygons:
GL_FILL // what we've been using
GL_LINE // 3D wireframe
GL_POINT // just the vertices
Call glPolygonMode() to change rendering mode:
// renders front and back facing polygons in wireframe
glPolygonMode( GL_FRONT_AND_BACK, GL_LINE );
If backface culling and depth testing are turned on, sometimes triangles end up very close to the same depth.
This creates z-fighting -- a problem where a part of the further polygon is displayed before rendering a closer triangle.
For applying decals to surfaces, use
glEnable( GL_POLYGON_OFFSET_LINE );
glPolygonOffset( -1.0f, -1.0f );
See glPolygonOffset() for details.
We won't be using this in our code, but:
Used to increase performance
Updates only the portion within a defined area
Doesn't update anything outside of the area
By default, scissor test is the size of the window
Use glScissor()
glScissor(int x, int y, int width, int height);
call to enable:
glEnable( GL_SCISSOR_TEST );
glScissor( 100, 100, 600, 400 ); // render in that area only
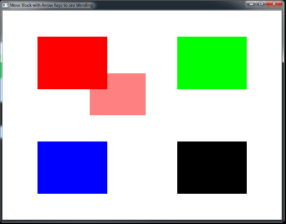
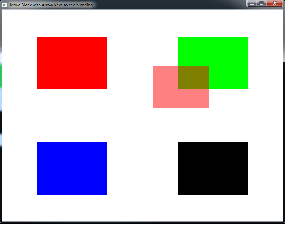
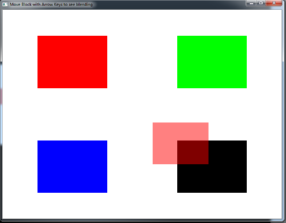
Without depth testing, color values overwrite one another
With depth testing, new fragments may replace old ones
Discarding further fragments does not apply with OpenGL blending: glEnable( GL_BLENDING );
Each color has a red, green, blue and alpha
See OpenGL Blending documentation for details.
We must specify how the blending occurs between
Destination color is the color already in the color buffer
Source color is the one we're about to write into the color buffer
Cf = ( Cs * S ) + ( Cd * D )
where
Cf is the final color
Cs is the source color
Cd is the destination color
S is the source blending factor
D is the destination blending factor
Enabled by
glBlendFunc( GL_SRC_ALPHA, GL_ONE_MINUS_SRC_ALPHA );
Take source and multiply rgb (colors) by its alpha value
Take destination and multiply rgb by (1-source alpha)
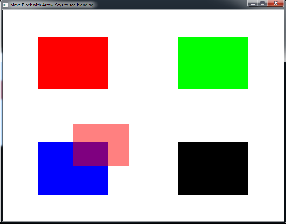
Blending calculation example:
Cd = ( 1.0f, 0.0f, 0.0f, 1.0f ) // Red
Cs = ( 0.0f, 0.0f, 1.0f, 0.6f ) // Blue, with source alpha 0.6
D = 1.0f – 0.6 == 0.4f
Cf = ( Blue * 0.6 ) + ( Red * 0.4 )
The program can change the underlying equation as well using glBlendEquation() parameter:
GL_FUNC_ADD Cf = ( Cs * S ) + ( Cd * D )
GL_FUNC_SUBTRACT Cf = ( Cs * S ) - ( Cd * D )
GL_FUNC_REVERSE_SUBTRACT Cf = ( Cd * D ) - ( Cs * S )
GL_MIN Cf = min( Cs, Cd )
GL_MAX Cf = max( Cs, Cd )
We have square pixels, which make the image look computer-generated
The visual aspect of this is called "the jaggies"
To eliminate, OpenGL uses blending of source with surrounding destination pixels:
glEnable( GL_BLEND );
glBlendFunc( GL_SRC_ALPHA, GL_ONE_MINUS_SRC_ALPHA );
Then:
glEnable( GL_POINT_SMOOTH );
glEnable( GL_LINE_SMOOTH );
glEnable( GL_POYGON_SMOOTH ); // *** outdated and no longer supported
Helps to smooth out polygons
Creates another buffer (color, depth and stencil)
All primitives are sampled multiple times, then "averaged"
You take a performance hit here, but it looks good:
glutInitDisplayMode(
GLUT_DOUBLE | GLUT_RGB | GLUT_DEPTH | GLUT_MULTISAMPLE
);
Then:
glEnable( GL_MULTISAMPLE );
Note: Point/Line antialiasing is disabled when multisampling is enabled